Showing posts with label Dessert. Show all posts

Tuesday, August 8, 2017

Chocolate Covered Strawberry Brownies


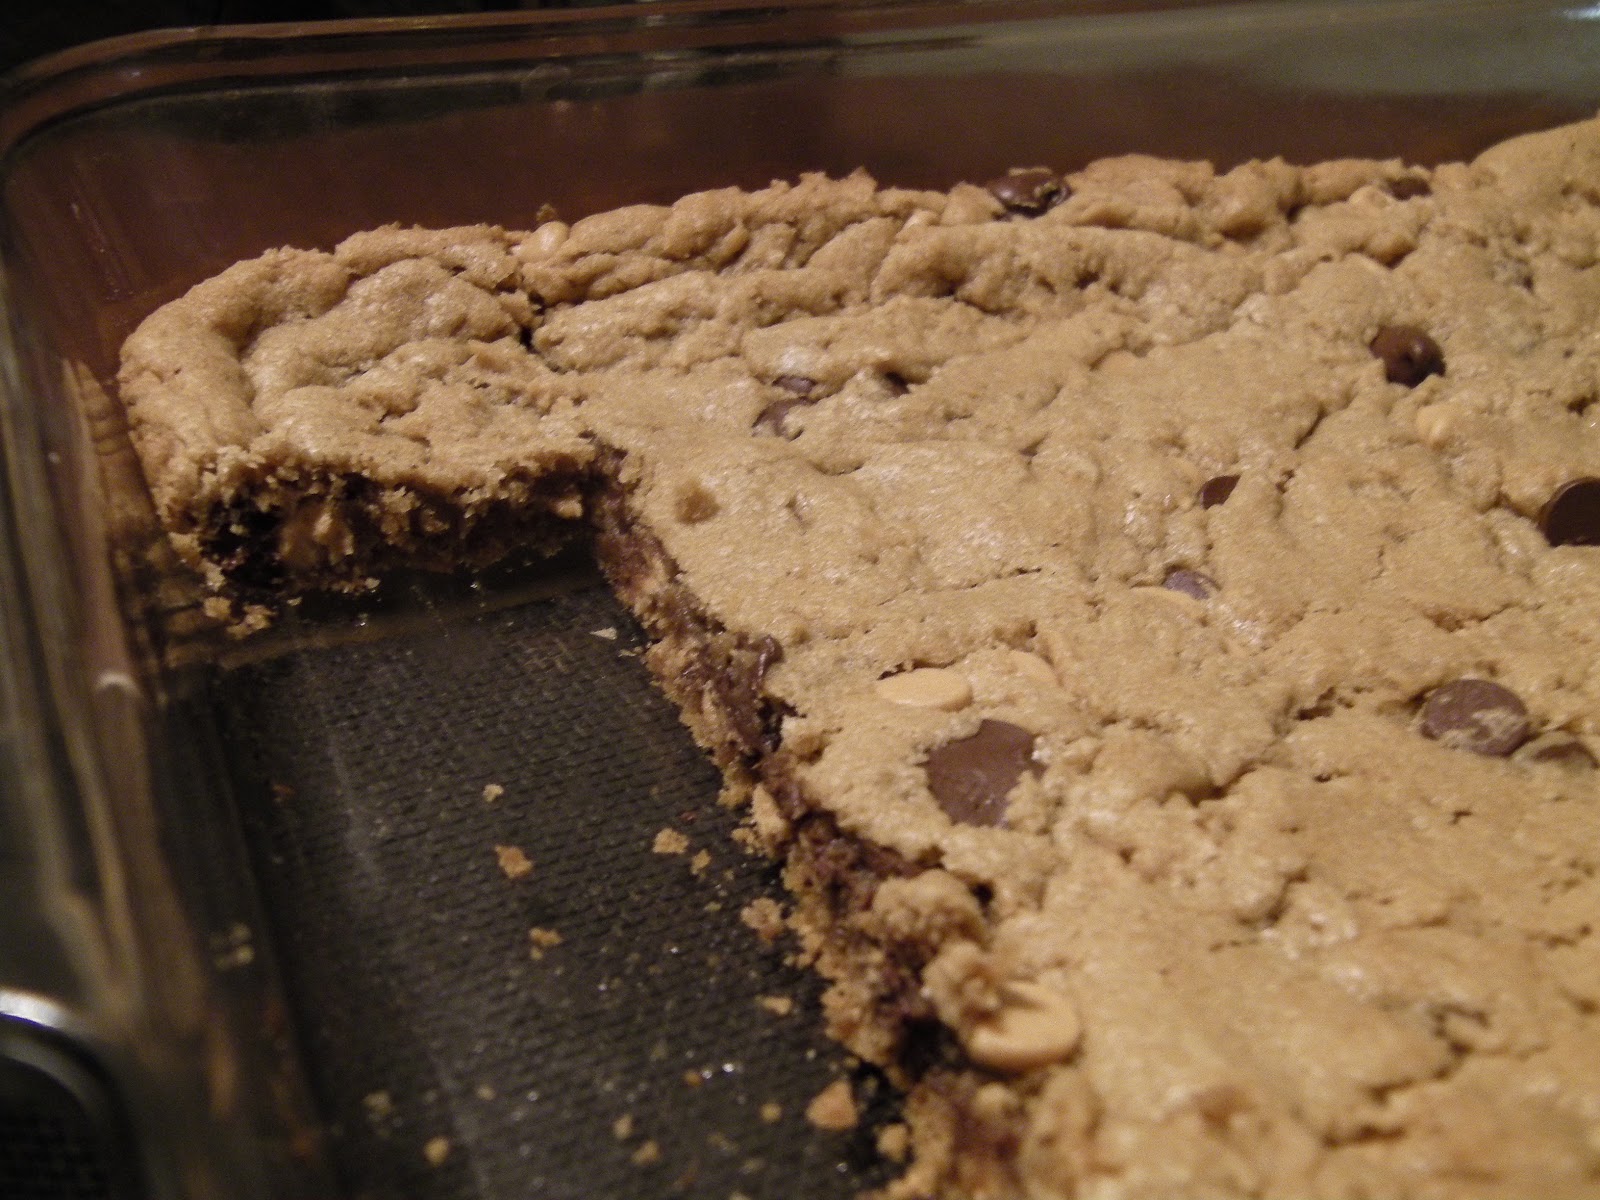
I almost always make brownies from a box because it's easy and more often than not, I think they taste better. But these from-scratch brownies fill a special niche of comfort food. If you want a brownie that is almost indistinguishable from a piece of fudge, these are the ones you want to make. The fresh strawberries on top send this dessert to gourmet level!

Adapted from: Here

Ingredients:
Brownies
1 cup plus 2 Tbs chocolate chips
1/2 C butter, cut into pieces
3 Tbs cocoa powder
3 eggs
1 1/4 C sugar
2 tsp vanilla
1 C flour
1/2 tsp salt

Topping
1 C fresh strawberries, diced
1/2 C chocolate chips
1 Tbs shortening

Directions:

Preheat oven to 350 and grease a 9x9 square baking pan. Melt the chocolate chips and butter in the microwave, pausing to stir every 30 seconds until smooth. Mix in the cocoa and set aside to cool. 

In a separate bowl, whisk the eggs, sugar, vanilla, and salt until well mixed. Stir in the warm chocolate mixture and then fold in the flour until just combined. Pour the batter into the pan and spread evenly with a spatula. Bake 35 to 40 minutes or until a toothpick inserted into center comes out with a few sticky crumbs. Cool on a wire rack to room temperature before adding the strawberries (about 2 hours).


When the brownies are cooled, sprinkle the strawberries evenly over the top. Melt the chocolate and shortening together in the microwave and pour evenly over the strawberries. Refrigerate until chocolate hardens (at least 1 hour).

Note: I doubled the recipe to make a 13x9 and cooked them for 10-15 extra minutes.


Thursday, April 2, 2015

My go-to Chocolate Chip Cookie Recipe


This is my go-to chocolate chip cookie recipe. The one I always return to because it just makes a great cookie.

Ingredients:
3/4 C sugar
3/4 C brown sugar
1 C butter, softened
1 tsp vanilla
1 large egg
2 1/4 C flour
1 tsp salt
2 C chocolate chips

Directions:
Preheat oven to 350. Beat sugars and butter until smooth. Add egg and vanilla and mix well. Stir in flour, baking soda, and salt. Fold in chocolate chips.

Place heaping tablespoon sized balls onto ungreased cookie sheet. Bake for 10-13 minutes or until golden brown.

Thursday, May 8, 2014

Cream Cheese Swirl Brownies


These are the most dense, fudgy brownies I have ever made. Topped with a marbling of cheesecake and brownie, each bite is the perfect mix of flavors.

Adapted from Here

Ingredients:
Brownie Layer:
1/2 Cup butter, chopped into pieces
4 ounces unsweetened chocolate, chopped
1 1/4 C sugar
1 tsp vanilla
2 eggs
1/2 C flour
1/4 tsp salt

Cheesecake layer:
8 ounces cream cheese (full fat), at room temperature
1/3 C sugar
1/2 tsp vanilla
1 egg

Directions:

Preheat oven to 325. Line an 9 x 9 square baking pan with aluminum foil. Melt the butter and chocolate in the microwave, pausing to stir every 30 seconds until completely smooth. Stir in the sugar and vanilla. Add the eggs one at a time, beating between each addition. Stir in the flour and salt until the entire mixture is smooth and glossy (the secret to a dense brownie is to not over-mix so do this by hand, not with an electric mixer). Set aside 1/2 a cup of the brownie mixture. Pour/press the rest of the brownie mixture into the bottom of the prepared pan. Set aside.

In your electric mixer, begin the cheesecake layer. Whip the cream cheese until smooth. Add the sugar, vanilla, and egg and beat until just smooth (don't over mix). Spread the cream cheese mixture over the brownie layer. Then add the reserved 1/2 cup of brownie mix, one dollop at a time to the top. Run a knife or wooden skewer through the batter to create a marble look.

Bake for about 30 minutes. The brownies should be set, the cheesecake should just be starting to brown, and a toothpick inserted in the center should come out with a few moist crumbs.

Let cool on a wire rack and then in the fridge until the brownies are set enough to cut into squares. You can store these in the fridge for several days. I enjoy eating mine cold with a large glass of milk!

Wednesday, March 12, 2014

Chocolate Mint Brownies


I made these brownies in preparation for St. Patrick's day. Who doesn't want to eat a little lucky green! The taste reminds me of Andes mints, which I love!

I had to make the brownies twice because I left out the flour in the first batch. Don't do that!

Adapted from here.

Ingredients:
 Brownies:
4 (1 ounce) squares unsweetened chocolate (you can substitute 3/4 C cocoa powder and 1/4 C oil if you want)
1 C margarine, softened
2 C sugar
3 eggs
2 1/2 tsp vanilla
1 C flour

Green layer:
1/2 C butter, softened
3 C powdered sugar
2 Tbs milk, give or take
1 tsp mint extract
green food coloring

Chocolate Coating:
1 1/3 C semi-sweet chocolate chips
6 Tbs butter
1/2 Tbs vanilla

Directions:
Preheat oven to 350. Melt the unsweetened chocolate in the microwave, stirring at 15 second intervals. Remove and allow to cool slightly. (If substituting cocoa powder you can skip this step). In a large mixing bowl, combine the chocolate with margarine and sugar until smooth. Beat in eggs one at a time and then add the vanilla. Stir in the flour until just blended. Pour into a greased 9x13 pan. Bake for 20-25 minutes or until the sides are just starting to pull away from the pan. The center might be a little soft still. Let cool on a wire rack.

To make the green layer, beat together the softened butter and powdered sugar. Add milk as needed until it is a spreadable consistency. Stir in mint* extract and desired amount of green food coloring (I used 6 drops). Spread over the cooled pan of brownies.

Refrigerate the brownies for 30 minutes before adding the chocolate coating.

To make the chocolate coating, melt the chocolate chips and butter in the microwave, stirring every 30 seconds until smooth. Add the vanilla and stir. Pour over the refrigerated brownies and spread quickly. Put back in the fridge for 10 minutes before slicing and serving.

I store my leftover brownies in the fridge and eat them cold. Enjoy!

*Make sure the mint extract you use is a flavor you like. I used McCormick's Pure Mint Extract which is a mix of spearmint and peppermint. If you don't like spearmint, make sure you use an exclusively peppermint extract.

Wednesday, December 18, 2013

Egg-Free Sugar Cookies


I found this sugar cookie recipe and thought I would give it a try so my son with an egg allergy could eat them too. We had a lot of fun making these, sampling the dough, and then decorating the finished product. And of course eating them too! They were a very good flavor and texture.

The original recipe has you refrigerate the dough at least an hour but I found that my dough was probably ready to roll out immediately. Since I did refrigerate it, I had to let it thaw for a good 15 minutes before I could roll it out.

Recipe Source
Ingredients:
3 1/4 C flour
1 1/2 tsp baking powder
1/2 tsp salt
1 C butter, softened
1 1/4 C sugar
1 tsp vanilla
1/4 C milk

Directions:
Combine flour, baking powder, and salt in a small bowl. In a large mixing bowl beat the butter and sugar well. Add the vanilla and milk, stirring until well mixed. Slowly add in the flour mixture. When dough comes together, divide into two lumps so you can work with a smaller batch at a time. Shape each lump into a flat disk and then roll out to 1/4 in thickness. If the dough seems too soft, wrap with plastic wrap and refrigerate an hour. Cut into desired shapes. Bake at 375 for 10-12 minutes or until the edges are golden brown. Let cool before frosting.

Sunday, September 8, 2013

Homemade Pop Tarts

pop tarts
Photo Source

I love breakfast pastries! I have tried a couple homemade pop tart recipes and this one is my favorites. The original website had several filling options but I have only tried the brown sugar cinnamon kind. Why make anything but the best? If you are interested in some other ideas, follow the link and see some options for alternate fillings.

Ingredients:
2 C flour
1 Tbs sugar
1 tsp salt
1 Cup unsalted butter, cubed (I used salted once and the crust did turn out too salty)
1 egg
2 Tbs milk

Cinnamon Sugar filling:
1/2 C brown sugar
1 to 1 1/2 tsp cinnamon to taste
4 tsp flour
1 egg to brush on pastry

Directions:
Mix flour sugar and salt in a large bowl. Cut in butter until it is in pea-sized lumps just as if you were making a pie crust (because basically you are). Combine the egg and milk and then pour into the flour mixture, stirring until just combined. Knead a few times on a floured counter if needed.

Divide the dough in half. One half will be the bottom of the pastry, and one will be the top. Now, if you want these to look like poptarts, roll out to about 1/8" thick, roughly a 9x12 rectangle. From there cut into 9 3x4 pieces. I usually just make one giant poptart and then cut it into pieces afterward but that means the filling won't be surrounded by crust in all of the pieces.

Beat the extra egg and brush it over the bottom pastry piece. This will be the inside and will help the filling stick to the pastry. If you have the dough in pieces, put a heaping tablespoon on each pastry. If you have one large piece of dough, just spread it evenly over the surface. Then place the remaining pastry piece/s on top. Use your fingers or a fork to press around the edges and seal the top and bottom together. Prick the tarts a few times with a fork to let steam escape.

Refrigerate the poptarts while you preheat the oven to 350. Bake on a greased or parchment lined pan for 20-25 minutes.

Saturday, February 16, 2013

White Chocolate Raspberry Cheesecake


I made this cheesecake for Valentine's Day and absolutely love the way it turned out. It looked great and tasted wonderful. I can't wait to try it again and make my decorative hearts look even better.

This cheesecake only uses 12 oz of cream cheese as opposed to other recipes that use up to 32 ounces. It doesn't sacrifice any flavor but is great for smaller groups/occasions because you can eat a large wedge of the cake without it being too much.

Recipe Source

Ingredients:
1 pre-made Oreo crust (really just easier than homemade if you ask me)
1 Tbs sugar
1 1/2 tsp cornstarch
1/3 C cold water
1 1/2 cup raspberries, fresh or frozen
12 oz (1 1/2 bars) cream cheese, softened
1/3 C sugar
1 egg
1 egg white
1 tsp vanilla
1 1/2 tsp lemon juice
1 C white chocolate chips (or 6 oz chopped white chocolate)
1/4 C heavy whipping cream

Directions:
Preheat the oven to 350.

Start by making the raspberry sauce. Mix 1 Tbs sugar and 1 1/2 tsp cornstarch in a small saucepan. Add water and raspberries and bring to a low boil, stirring frequently. Allow mixture to boil for about 5 minutes, whisking constantly until sauce thickens. Remove from heat and put sauce through a fine mesh strainer to remove seeds. Set aside.

In a mixing bowl, combine cream cheese and 1/3 C sugar. Beat until fluffy. Add egg, egg white, vanilla, and lemon juice. Mix well and set aside.

Melt the chocolate chips (30 second intervals in the microwave at 50% power). When smooth, stir in the heavy cream. Add to the cream cheese mixture and blend until smooth.

Pour 2/3 C of batter into prepared crust and spread evenly. Then spoon on 2 Tbs of the raspberry sauce. Using a knife or toothpick, swirl the raspberry sauce into the cheesecake. Spoon on remaining batter and smooth with a spatula. Be careful to not let any of the raspberry layer show through.

Fill a clean medicine syringe with raspberry sauce. Starting in the center, squeeze out small drops of sauce, creating a spiral pattern as you move out. Start with small drops and gradually increase the size. I thought I had mine packed together pretty tight but next time I will make the drops smaller and closer together.

Grab a toothpick and starting in the center, run the toothpick through the center of each drop, following the spiral. Don't lift the toothpick until the very end. This will create the heart shapes.

Bake for 40 minutes or until center is still just a bit jiggly. Then turn oven off but leave the cheesecake in for another 5 minutes. Remove and cool completely. Refrigerate at least 6 hours before serving. Top slices with remaining raspberry sauce if desired.

Saturday, January 5, 2013

Cinnamon Scones


I finally bought some cinnamon chips. I have been tempted ever since my cinnamon muffin recipe, which called for them (I used a substitute). I almost never see cinnamon chips at the store but during the holiday season I saw them often. I have been trying to avoid unnecessary grocery expenses but I decided if I didn't buy a bag of them now, I would have to wait until Christmas 2013.

I am glad bought them! Now the only problem is I want another bag because I have so many recipes I want to try out. But I am super glad I started with this recipe for cinnamon scones. It was amazing! The recipe made more than I anticipated so I gave some away to friends but now I am almost wishing I had saved them all for myself! Eating one of these is like eating a thick muffin top of a cinnamon streusel muffin - the best part.

And you bet I actually used heavy cream when it called for it. I was lucky enough to have some left over from my amazing chocolate bundt cake. I suppose next time I make this, I will try substituting milk and see how it turns out.

Recipe Source

Ingredients:
 3 C flour
1/3 C sugar
5 tsp baking powder
1/2 tsp cinnamon
1 C unsalted butter (2 sticks)
3/4 C heavy cream
1 egg
1 tsp vanilla
1 C cinnamon chips
Topping:
1/2 C sugar
1 tsp cinnamon
1 1/2 tsp heavy cream

Directions:
Preheat oven to 350. Mix together flour, 1/3 C sugar, baking powder, and cinnamon. Cut butter into tablespoon sized pieces and then cut it into the flour mixture as you would in a pie or biscuit dough until mixture resembles course crumbs. Fold in cinnamon chips. 

In separate bowl mix heavy cream, egg, and vanilla. Add to the main mixture, stirring until combined. Place dough on a piece of parchment paper and shape as desired. You can roll it out with a rolling pin or just use your hands to flatten it to 1/2 inch thick. Shape it into a rectangle or circle.

Combine the topping ingredients and then sprinkle over dough, pressing lightly. Cut dough into desired piece sizes. I made mine into about 10 squares and then cut them in half for 20 triangles. If you press it in a circle you can cut pizza-like wedges.

Place parchment paper on a baking sheet and bake for 20-25 minutes. Enjoy while they are warm!

1 batch makes 8-10 servings

Friday, January 4, 2013

Chocolate Sour Cream Bundt Cake


This cake is AMAZING. It is rich and moist. Decadent. If you have ever had a chocolate cake from Sam's Club or Costco, this is even better.

I adapted the recipe from this blog.

Ingredients:
2/3 C cocoa powder, plus extra for dusting pan
3/4 C semisweet chocolate chips
2/3 C boiling water
1 1/2 C flour
1 tsp baking soda
3/4 tsp of kosher salt
13 Tbsp unsalted butter
1 2/3 C brown sugar
3 eggs
2 2/3 tsp vanilla
1 C sour cream
1 C semisweet chocolate chips
Ganache:
2/3 C semisweet chocolate chips
1 1/3 Tbs unsalted butter
1/3 C heavy cream
mini chocolate chips, if desired

Directions:
Have the ingredients at room temperature. Preheat the oven to 325. Thoroughly grease your bundt pan and dust with cocoa powder. In a small bowl, combine cocoa powder and chocolate. Add the boiling water and stir until the chips are melted and smooth.

Sift together flour, baking soda, and salt onto a piece of parchment paper. Set aside.

In your electric mixing bowl, beat butter until smooth. Add brown sugar and beat on medium speed for up to 5 minutes, until mixture lightens in color. You can stop the mixer periodically to scrape down the bowl. Add eggs one at a time and then add vanilla.

While your mixer is running on slow, alternately add the sifted flour mixture with the sour cream in 3 additions, beginning and ending with flour. Slowly pour in the chocolate mixture and beat until entire mixture is brown and there are no white streaks. Fold in chocolate chips.

Pour batter into bundt pan. Spread batter so the sides are about 1 inch higher than the center. Place on a baking sheet and bake for 60-65 minutes until toothpick inserted in center comes out with just a few crumbs. Let cool on cooling rack for 15 minutes. Then carefully invert and de-pan. Let cool completely before adding ganache, at least 1 hour.

To make the ganache, heat heavy cream in a small saucepan. When it just comes to a boil, add the butter and chocolate chips. Whisk until smooth. Let it cool for about 1 minute until it starts to thicken. Pour ganache over top of cake, allowing it to drip down the sides. Sprinkle the top with mini chocolate chips while the ganache is still warm.

Saturday, July 21, 2012

S'more Bars

I have been seeing a lot of S'more recipes on Pinterest. I love those treats, pretty sure they are my favorite part of camping. So I finally made one of the recipes today on a play-date with my friend. This tasted remarkably like a s'more! So good and gooey. It really has all the elements a s'more needs!
Original Recipe

Ingredients: 
1/2 cup butter, room temperature
1/4 cup brown sugar
1/2 cup sugar
1 egg
1 tsp vanilla
1 1/3 cups flour
3/4 cup graham cracker crumbs
1 tsp baking powder
1/4 tsp salt
2 king-sized hershey's bars
1 1/2 cups marshmallow creme/fluff (not melted marshmallows)

Directions:
In a large bowl, cream butter and sugar. Beat in egg and vanilla. Add flour, cracker crumbs, baking power, and salt. Mix. Press half of the dough into the bottom of a greased 8-inch square baking pan. Spread a layer of marshmallow fluff evenly over it (it is okay if you don't use all 1 1/2 cups). Place the hershey's bars over the top so they cover the whole thing evenly. Press remaining graham dough over the top. Bake in a 350 degree oven for about 30 minutes. Eat with a very large glass of milk!

Saturday, February 25, 2012

Orange Creamsicle Cookies

I know I have been posting desserts almost exclusively lately. I will try to post a few main dishes soon. But these cookies are so tasty that I needed to add them to my collection. My friend Jessica brought a few of these to me when I was sick and I have already made them twice since. They are a citrus-y cookie that is a nice something different if you aren't feeling like chocolate chip cookies.

I usually have to add extra flour to keep them from spreading out to much while baking.

Ingredients:
2 1/2 C flour
3/4 C white sugar
3/4 C brown sugar
1 tsp baking powder
1/2 tsp salt
1 C butter, softened
1 egg
1 1/2 tsp vanilla
1 1/2 Tbsp orange juice concentrate, melted
2 Tbsp orange zest (between 2 and 4 oranges) - (I just added extra concentrate instead of the zest)
1 1/2 C white chocolate chips

Directions:
Preheat oven to 375. Cream butter and sugars several minutes, until light in color. Add egg, vanilla, orange juice concentrate, and zest. Mix until well combined. In separate bowl, whisk together flour, baking powder, and salt. Add flour mixture to wet mixture and blend just until combined. If dough is too sticky, add flour a little bit at a time until more of a play-dough consistency. Stir in white chocolate chips. Scoop dough balls onto ungreased cookie sheet. Bake for 8-10 minutes until edges are slightly brown. Do not over bake. Cool on cookie sheet for a few minutes until no longer soft and squishy. I enjoy these room temperature or even cool. I actually don't think I have tasted them warm.

Saturday, January 14, 2012

Peanut Butter Chocolate Chip Bars

I made these tasty bars for a family gathering. I enjoyed them most when they were still warm but they were good the next day too. My husband really enjoyed these. I think it was because the ratio of batter to chocolate/peanutbutter chips was so low. Probably 1:1

Recipe Source

Ingredients:
1½ C flour
½ tsp baking soda
¼ tsp salt
¾ C brown sugar
¾ C peanut butter
½ C butter, at room temperature
½ C sugar
1 egg
1 tsp vanilla extract
1 C semisweet chocolate chips
1 C peanut butter chips

Directions:
Preheat oven to 350 and spray a 9 x 13 inch pan with Pam. In a small bowl combine flour, baking soda, and salt. In large mixing bowl cream sugars, peanut butter, and butter. Add egg and vanilla until combined. On slow speed, mix in dry ingredients until just combined. Turn off mixer and fold in chips with a spatula. Spread evenly into prepared pan. Bake 16-20 minutes or until set.

Friday, December 9, 2011

No Molasses Gingerbread Men


      Every holiday season I find myself wanting to make gingerbread men. It is a conundrum because I don't really like the taste of gingerbread. I am not sure what it is but have suspected molasses is the culprit. Call me childish but I think the flavor is too strong. So when I found this recipe for gingerbread men that did not call for molasses, I had to try it. I was very pleased with the result. It is a mild gingerbread cookie with a very kid-friendly taste while still reminding me of Christmas. And I got to decorate cute gingerbread men!

Recipe Source

Ingredients:

1 (3.5 oz) package butterscotch pudding mix

½ C butter

½ C brown sugar

1 egg

1 ½ C flour

½ tsp baking soda

1 ½ tsp ground ginger

1 tsp ground cinnamon


Directions:

 In a medium bowl, cream butterscotch mix, butter, and brown sugar. Stir in the egg. Combine the rest of the ingredients in a separate bowl; stir into the pudding mixture. Cover and chill until firm (1 hour).


Preheat the oven to 350 degrees. Grease baking sheets. On a floured board, roll dough out to about 1/8 inch thickness, and cut into desired shape. Bake 10 to 12 minutes until the cookies are golden at the edges. Cool on wire racks.

I used regular cake icing in a plastic bag to pipe on the decorations.

Saturday, November 26, 2011

Oatmeal Coconut Chocolate Chip Cookie


YUMMMM!!! This is an amazing cookie. I had purchased about a cup of unsweetened shredded coconut from the bulk bins at my local grocery store. I had been planning on blending it up to make coconut butter as I had seen from several online sources. However, my blender was clearly not powerful enough for the said transformation. I did not want the coconut to go to waste so I began looking for a cookie recipe.

I found this recipe and was a little skeptical because there was no picture. And the recipe called for oil instead of butter, making it sound more like a muffin recipe than a cookie one. Add to all this that I do not particularly care for a strong coconut flavor and I am surprised I even tried it. But I am soo glad I did. This might be my new favorite cookie recipe. I kid you not, the dough is to die for. Maybe even better than plain chocolate chip cookie dough (if that is even possible). I think next time I might even fore-go the chocolate chips because this cookie has enough flavor and texture without them.

The dough was a little crumbly when I was scooping it out to put on the cookie sheet. I ended up using my hands to press the balls together. But the cookies came out moist and chewy. Please try this recipe if you ever find yourself with some shredded coconut! I only baked up a dozen cookies and saved the rest as dough to eat or bake later. However, I am pretty confident that I could have made 30 cookies total from the recipe.

Ingredients 
1 1/4 C oatmeal 
1 C flour 
1/2 C sugar 
1/2 C brown sugar 
1 C. flake coconut (mine was blended up into really small pieces) 
1/2 C. chocolate chips (I consider this optional) 
1/2 tsp. baking soda 
1/2 tsp. salt 
1/2 C oil 
1 egg 
1 tsp. vanilla 


Directions
Combine dry ingredients in a large bowl. Then mix in egg, oil, and vanilla. Drop onto a greased cookie sheet. Bake at 325 for 12 to 15 minutes.

Wednesday, November 16, 2011

Dairy Free Banana "Ice Cream"

I have been on a dairy free diet for about two months now since my nursing baby is sensitive to the protein in cow's milk. One thing I have missed the most is ice cream. There really is just no substitute for the cold creamy texture and delicious flavor.

I found this recipe on a vegan website and decided it was worth a try. I kept my expectations low so that might have influence how successful I think this recipe was. It was the closest to "ice cream" that I have managed to come in my weeks of experimentation (and I have tried several things). It was very cold and the texture was great (thick and creamy). I ate it right out of the mixer! If they sold banana flavored ice cream (do they?) this would be it. I think next time I make it I will experiment with different mix-ins to try to tone down the banana flavor...I might try adding some strawberries! Maybe some cocoa powder (1/2 Tbs) to make it chocolate...

Anyway, this one is worth a try even if you can eat ice cream. I think it is a fairly healthy alternative (think a serving a fruit instead of cream) and quite tasty to boot!

Ingredients: (Makes 1 serving)
1 frozen banana
1 tsp almond milk (or regular milk)
1/4 tsp vanilla
pinch of salt
1 Tbs peanut butter
chocolate chips, if desired (or other mix in)

Directions:
Cut the frozen banana into small slices and place in small food processor. Add milk, vanilla, and salt. Pulse until broken into small pieces. Add peanut butter and chocolate chips or any other flavoring. Pulse until smooth and creamy. Enjoy!

If you try it, let me know what mix ins you used!

Wednesday, October 26, 2011

Pumpkin Muffin Doughnut Holes


While Pumpkin Muffin Doughnut Holes is a long name for a recipe, I like to know what I am dealing with from the beginning. It is fall and so I am making a lot of pumpkin foods lately. I have been wanting to try these for a while but never got around to it until today. As I ate them I was wondering why I had waited so long. These were AMAZING! They were so delicious that I couldn't stop myself before I ate *six* of them. They definitely satisfied my doughnut craving and were so much easier than doughnuts - no deep frying!

I adapted the recipe from here. Sorry for the weird measurements again. I halved the recipe and still easily got 2 dozen doughnut holes.

Ingredients:

Scant 3/4 C Flour
1 tsp Baking Powder
1/4 tsp Salt

1/4 tsp Cinnamon
1/8 tsp Nutmeg
1/4 tsp Allspice
1/6 C Vegetable Oil
1/4 C  Brown Sugar
1/2 Egg
1/2 tsp Pure Vanilla Extract
scant 1/2 C canned Plain Pumpkin Puree
1/4 cup Milk
Cinnamon Sugar Coating:
3-4 Tbs melted butter
1/4 C of cinnamon sugar mixture

Directions:
In a medium bowl stir together first six ingredients. In a larger bowl, whisk oil, brown sugar, egg, vanilla, pumpkin and milk until smooth. Pour dry ingredients into the wet ingredients and stir until just mixed. Spoon into a greased mini-muffin tin. Cook at 350 for 10-12 minutes or until toothpick inserted in muffin comes out clean.
Let rest two minutes before dipping.

While the muffins are baking, melt your butter in one bowl and create a cinnamon sugar mix in another. When the muffins are cool enough to handle, dip in butter and then in cinnamon sugar mix to coat. 


I did some calculations and each muffin is about 40 calories if you don't dip them. If you dip them (and I highly recommend you do) you are looking at closer to 60 calories a piece. So go ahead, eat a couple!

Tuesday, October 11, 2011

Strawberry Lemonade Bars


I found this recipe via Pinterest and decided to give it a whirl this Sunday. It was fun to make because it had real strawberries in it and came out a great color without food coloring. I only wish my food processor was bigger than 21 oz so I could have made the whole thing in it like the directions called for. Unfortunately, my baby was napping so I didn't want to get the blender out. I used my somewhat quieter stand mixer and I think that things didn't get blended well enough. With that said, this was still an enjoyable twist on the classic lemon bar.


Ingredients:
Crust
1/4 cup sugar
1/2 cup butter, room temperature
1 1/2 cups all purpose flour
1/4 tsp salt
Filling
1 C lemon juice
2-3 tsp lemon zest
1/2 cup pureed strawberries (about 3/4 cup berries)
1 1/4 cups sugar
4 large eggs
1/4 cup all purpose flour
1/2 tsp baking powder
1/4 tsp salt
 
Directions:
Grease a 13x9 inch pan and preheat oven to 350. In a large bowl cream together butter and sugar for the crust. Slowly add the flour and salt until crumbly. Press into pan and bake for about 17 minutes.

Meanwhile make the filling: In a food processor, blend lemon juice, zest, strawberries, sugar, and eggs until smooth. Pulse in flour, baking powder, and salt. Pour over the hot crust and put back in oven for another 23-26 minutes. Cool completely before slicing. Sprinkle powdered sugar over just before serving.

Makes 24 bars.

Monday, July 25, 2011

New York Cheesecake with Chocolate Ganache

I made a wonderful New York Cheesecake. The first time I made this, I used a sour cream topping. This time, I topped it with a chocolate ganache. I highly recommend both so go with whichever you are feeling at the time.

Recipe from Here

Ingredients:
Crust:
2
Cups of Graham Crackers, finely crushed
1/4 C sugar
1/2 C butter or margarine

Filling:
32 ounces of cream cheese, room temperature (use full fat, not reduced)
1 C sugar
3 Tbs flour
5 eggs
1/3 C heavy whipping cream
1 Tbs lemon zest
1 tsp vanilla

Ganache:
8 oz of semisweet chocolate (I used 1 1/3 C of chocolate chips)
3/4 C heavy whipping cream
2 Tbs butter or margarine


Directions:

Mix the crust ingredients. Pat into bottom of greased 9-in springform pan (be sure to grease the sides as well so the cake doesn't stick) and about an inch around the side. Put in refrigerator.

In electric mixer, beat cream cheese, sugar, and flour until smooth, scraping down sides as needed. (About 2 minutes).
Add eggs, one at a time, beating for 30 seconds after each. Scrape down the sides of the bowl. Add the lemon zest, vanilla and whipping cream.

Pour the filling into the crust. Place pan on larger baking pan to catch any leaks. Bake at 350 for 15 minutes. Then turn the oven down to 250 and bake for another 60-90 minutes. Cheesecake is done when outer part is solid and just the center is a bit wet and wiggly. Let cool completely before covering and refrigerating. Refrigerate at least overnight before eating.
Don't worry if it gets a crack in it like mine did, that's what the topping is for!

Topping:
Place the chopped chocolate into a bowl. In a saucepan, heat whipping cream and butter until just boiling. Pour over chocolate. Let sit a few minutes then gently stir to melt chocolate. Try not to incorporate any air for a smooth ganache. Once chocolate is fully Incorporated place in fridge for 20-30 minutes until ganache thickens.

Remove sides from spring form pan. Place cheesecake on a wire rack over a baking sheet to catch any excess ganache. Poor the thickened ganache over the center of the cheesecake. Then, using a knife or a spatula, push ganache from center to edges of cake.

Put any extra ganache back into the fridge. Once it hardens, you can roll it into little truffles and dip in cocoa powder.

If you whip this recipe instead of gently stirring, it will become a fluffy icing.
I like to cut the slices with dental floss. It makes a smooth, clean cut.

Tuesday, July 12, 2011

Lemon Cream Bars

This is the second time I have made these lemon cream bars. The original recipe calls for a 9x13 pan but I thought that was too big. The first time I made it in a medium sized pan that I borrowed. This time, I didn't have that size so I made it in a 9x9 dish. I preferred the size in between 9x13 and 9x9. It made a bar that was thick enough to enjoy but not too much. If you like lemon bars you will like these. And it was very easy.

Ingredients:
Filling:
14 oz can sweetened condensed milk
1/2 C lemon juice
Streusel:
1 1/2 C flour
1 C Oats
1 C Brown Sugar
2/3 C butter, melted
1 tsp baking powder
1/2 tsp salt

Directions:
Stir together milk and lemon juice. Let sit. Meanwhile mix the streusel ingredients until crumbly. Pat half of the mixture into a greased baking dish. Pour the filling over it and sprinkle with remaining streusel. Bake at 350 for 20 minutes. Let cool. Refrigerate leftovers.

Saturday, June 11, 2011

Homemade Oreos


Nothing can replace a real Oreo but these were fun to make and tasty. I thought they were going to be a softer, whoopie pie sort of cookie but the wafers were on the crunchy side, making a dip in milk essential.

(Recipe from this site)

Ingredients:
Wafers:
1 1/4 C flour
1/2 C cocoa powder
1 tsp baking soda
1/4 tsp baking powder
1/4 tsp salt
1 C sugar
1/2 C plus 2 Tbs butter, room temperature
1 egg

Filling:
1/4 C butter, room temp
1/4 C shortening
2 C powdered sugar
2 tsp vanilla

Directions:
Mix the dry ingredients for the wafers. Beat in butter and egg. Keep mixing until dough balls together (this took a few minutes for me). Place desired sized balls on a parchment lined baking sheet. Flatten slightly with fingers or glass. Bake for 9 minutes at 375. Let cool on cooling rack.

Meanwhile, put butter and shortening in a small bowl. Gradually beat in powdered sugar and vanilla.

To put the cookies together, you can use a piping bag to squeeze the filling into the center of a cookie. Squeeze the two cookies together to get the filling to spread to edges. Alternately, you can simply use a knife to spread filling onto cookies.

This recipe make plenty of filling for the number of cookies. I thought they actually tasted better a few hours after I made them, once they were completely cool and crunchy. They stored well for several days.