Fettuccine Alfredo for dinner tonight. Yum! And with this recipe, ready super quick too! Sometimes I add chicken.
Ingredients:
1 1/4 C chicken broth
4 tsp flour
4 oz cream cheese, cubed
2 Tbs parmesan cheese
1/4 tsp garlic powder
1/4 tsp pepper
Directions:
Mix broth and flour in large skillet over medium-high heat. Stir in cream cheese, Parmesan, garlic powder, and pepper. Cook 2 minutes, stirring constantly until mixture boils and thickens. Stir in cooked chicken if desired.
Serve with pasta. Makes about 3-4 servings of sauce.

Monday, November 15, 2010
Saturday, October 30, 2010
Amish Friendship Bread - No Starter needed
I like Amish Friendship Bread. The only thing I don't like about it is taking care of the starter and ending up with 6 loaves of bread everytime I make it. So this recipe is all the goodness of Amish Friendship Bread without the worry. The measurements are kind of weird because I halved the recipe to just make one loaf.
Ingredients:
3/8 C sugar
1/4 C milk
3/8 C flour
1/2 C oil
1 1/2 eggs
1/2 tsp vanilla
1 C flour
1/2 C sugar
3/4 tsp baking powder
1 tsp cinnamon
1/4 tsp salt
1/4 tsp baking soda
1 box instant pudding mix (whatever flavor)
Chocolate Chips (optional)
Directions:
Combine the first six ingredients. In a separate bowl mix the dry ingredients. Combine, stirring until just blended. Add the chocolate chips if you desire. (I can never make a dessert without chocolate!).
Pour batter into a bread pan. Bake at 325 for an hour. Let cool 10 min in pan, then remove from pan to finish cooling.
I used butterscotch pudding because that was the only pudding mix I had in the house. But I have also used chocolate before and I believe vanilla or any other flavor would turn out wonderfully.
Sunday, October 10, 2010
Gourmet Caramel Apples


This is the second time we have made caramel apples. The first time we invited some friends over and the apples turned out tasting delicious. This time they also looked good. Wish I had taken pictures of the better ones before we ate them!
Ingredients:
5 Large Granny Smith Apples
1 package of kraft caramels
2 Tbs milk
1 Cup chocolate chips
1 Tbs oil
Candy of your choice
Directions:
First thing you want to do, is stick the apples in boiling water one at a time for 2-3 seconds. Take them out with a slotted spoon and carefully dry them. This will help get the wax off and help the caramel stick to the apples. (We did not do this our first time and had trouble with the caramel sliding off). Don't worry if the apples get these funny white spots on them, you will be dipping them in caramel soon.
Put the apples in the fridge to keep cool. Meanwhile, melt the caramels together with 2 Tbs milk in a saucepan over medium low heat, stirring constantly. Prepare a cookie sheet with wax paper and spray with pam to avoid having your apples stick. Stick a Popsicle stick into each apple (the sticks should come in the caramel bag). Carefully roll the apple in the melted caramel, coating evenly. Hold over pot and let excess caramel drip off. Turn the apple upside down and hold for a few seconds to let the caramel harden on the outside instead of pooling at the bottom. Place the apple on the cookie sheet.
Once all of your apples are dipped, place the cookie sheet in the fridge. Let caramel harden for about twenty minutes.
Meanwhile, prepare bowls of crushed candy to roll the apples in. Jeff and I crushed reeses pieces and oreos this time. Anything you like will work fine. You might have to start with cold or frozen candy bars for them to crush well.
Melt 1 Cup of chocolate chips with 1 Tbs oil. Dip the apples in the chocolate just as you did with the caramel. Or you can simply drizzle a small amount of chocolate on your apple if you don't want it chocolate covered. Immediately roll the apples in the crushed candy. Place back on cookie sheet and let cool in fridge for 20 minutes.
Cut into slices and serve. The sweet outside pairs with the tart granny smith apple and they balance out wonderfully. Keep the leftovers in the fridge. Let sit at room temperature 5-10 minutes before slicing to soften.

Ingredients:
5 Large Granny Smith Apples
1 package of kraft caramels
2 Tbs milk
1 Cup chocolate chips
1 Tbs oil
Candy of your choice
Directions:
First thing you want to do, is stick the apples in boiling water one at a time for 2-3 seconds. Take them out with a slotted spoon and carefully dry them. This will help get the wax off and help the caramel stick to the apples. (We did not do this our first time and had trouble with the caramel sliding off). Don't worry if the apples get these funny white spots on them, you will be dipping them in caramel soon.
Put the apples in the fridge to keep cool. Meanwhile, melt the caramels together with 2 Tbs milk in a saucepan over medium low heat, stirring constantly. Prepare a cookie sheet with wax paper and spray with pam to avoid having your apples stick. Stick a Popsicle stick into each apple (the sticks should come in the caramel bag). Carefully roll the apple in the melted caramel, coating evenly. Hold over pot and let excess caramel drip off. Turn the apple upside down and hold for a few seconds to let the caramel harden on the outside instead of pooling at the bottom. Place the apple on the cookie sheet.

Once all of your apples are dipped, place the cookie sheet in the fridge. Let caramel harden for about twenty minutes.
Meanwhile, prepare bowls of crushed candy to roll the apples in. Jeff and I crushed reeses pieces and oreos this time. Anything you like will work fine. You might have to start with cold or frozen candy bars for them to crush well.
Melt 1 Cup of chocolate chips with 1 Tbs oil. Dip the apples in the chocolate just as you did with the caramel. Or you can simply drizzle a small amount of chocolate on your apple if you don't want it chocolate covered. Immediately roll the apples in the crushed candy. Place back on cookie sheet and let cool in fridge for 20 minutes.
Cut into slices and serve. The sweet outside pairs with the tart granny smith apple and they balance out wonderfully. Keep the leftovers in the fridge. Let sit at room temperature 5-10 minutes before slicing to soften.

Monday, September 27, 2010
Steak Marinade
I don't make steak very often so I didn't really know what to do with the one I bought. I used this marinade and the steak turned out delicious! It was juicy, tender, and flavorful. It sort of caramelized on the outside too.
This is supposedly a Teriyaki Steak Marinade but it wasn't overwhelmingly teriyaki flavored to me.
Ingredients:
1/3 C soy sauce (I used half soy sauce and half Bragg's Amino sauce)
3 Tbs honey
3 Tbs white wine vinegar
3/4 C vegetable oil
1 tsp ground ginger
1 tsp garlic powder
Directions:
Mix all ingredients together in a plastic bag. Place steak in bag. Ziploc and let marinate in refrigerator for several hours, preferably overnight. Be sure to flip the meat regularly so each side gets a good soaking. Grill the steaks. Enjoy!
Thursday, September 9, 2010
Sweet and Sour Sauce
Sorry, no picture this time. This is a quick sweet and sour sauce I made to pour over some leftover rice and chicken. Made a good Chinese meal. I have also heard sweet and sour sauce is good over meatballs.
Ingredients:
Juice from a medium can of pineapples (15.25 oz)
1/4 C ketchup
1/4 C brown sugar
1/4 C rice wine vinegar
1 1/2 Tbs cornstarch
1/2 tsp garlic
1/4 tsp mustard powder
1 Tbs Worcestershire Sauce
1/2 tsp ground ginger
Directions:
Mix all ingredients. Heat in a saucepan, stirring until thickened. Make sure to cook until thick or the sauce will taste like cornstarch. Serve over chicken and rice.
Sunday, August 15, 2010
Butterhorns
These buttery crescent rolls are tasty and not very difficult to make. I am creating my second batch right now, hoping to freeze half of it so I can bake them at a shorter notice.
Ingredients:
1 Tbs active dry yeast
1 tsp plus 1/3 C sugar
1/2 C warm water
1/2 C butter (or margarine), softened
1/2 warm milk
1 egg
3/4 tsp salt
4 C flour
Directions:
Dissolve yeast and 1 tsp sugar with water in a large mixer. Add the butter, milk, egg, salt, 1/3 cup sugar, and 2 cups of flour. Beat until well mixed. Add the remaining flour. Knead in mixer for 3-4 minutes or by hand for 6-8 until a smooth, soft dough is formed.
Let rise in greased bowl until doubled in size (about 1 hour). Punch down and divide dough into two balls. Roll the balls into 12 inch circles. Cut each circle into 12 wedges and roll to form crescent shapes (start with wide end).
At this point, flash freeze the ones you want to save. Once frozen, place them in a freezer bag.
For those you are cooking now, cover and let rise on baking sheet for 30 minutes or until doubled in size. Bake at 350 degrees for 10-12 minutes or until golden brown.
PS: Freezing worked out great. I thawed them in the fridge overnight and they were ready to go into the oven that evening. Tasted great.
Monday, August 9, 2010
Mexican Lasagna
 This one I am proud of because I made it up myself. Okay, so maybe it isn't that hard to make a taco casserole but hey, you've got to start somewhere.
Ingredients
Tortillas
1 can black beans
1 1/2 C rice (uncooked measure)
1 lbs ground beef
1 C salsa
1 packet (3 Tbs) Taco Seasoning
Cheddar Cheese
Directions
Cook the rice as you normally would. Meanwhile, brown the ground beef and add the packed of taco seasoning and 2/3 c of water (or whatever it says on your packet). Let this simmer for a few minutes. Then add the rinsed and drained can of black beans, letting them heat up with the taco meat.
When the rice is done, add the salsa and mix together.
Line the bottom of the casserole with tortillas. Put down a layer of rice, then meat/beans, then sprinkle some cheese. Cover with another layer of tortillas. Layer on the rest of the ingredients in the same order.
Bake at 350 for 30 minutes or until heated through and cheese is bubbly. Serve with sour cream and/or more salsa.
Tuesday, July 20, 2010
Watermelon Cake

I was in charge of dessert at my family's 4th of July Barbecue. I thought this festive watermelon cake would be fun to make. It was also very simple.
Ingredients:
1 white cake mix
ingredients on cake mix box
cream cheese or vanilla frosting
watermelon jello
a few chocolate chips
food coloring
Directions:
Prepare cake mix as directed on box. Add in the watermelon jello mix (I went to three grocery stores and could not find watermelon jello so had to use strawberry. It worked just fine). Bake according to directions in two round cake pans. Let cool completely. Frost with dyed food coloring. Be sure to reserve some as a white border between the red and green. Add chocolate chips to center as seeds. Enjoy!
Tuesday, July 13, 2010
Raspberry Tart

Our neighbor gave us some fresh raspberries from his mother's garden. I seized the opportunity to make a delicious summer treat. I had never made a tart before but often have admired their beauty.
I got this tart recipe from the Joy of Baking website. I followed most of the directions. I do have to say that the pastry cream had me worried for a bit. I tasted it when it was warm and it lacked flavor. All put together, the tart ended up tasting good, but I think I will use a different cream recipe next time.
Not so for the crust, this sweet pastry crust is delicious. I had some extra dough so I sprinkled it with cinnamon sugar and baked it as a separate treat. Yum!
Ingredients:
Sweet Pastry Crust:
1 1/2 C flour
1/8 tsp salt
1/2 C unsalted butter (I used margarine)
1/4 C sugar
1 large egg, lightly beaten
Pastry Cream:
1 1/4 C milk
1 tsp vanilla
3 egg yolks
1/4 C sugar
2 Tbs flour
2 Tbs cornstarch
2-3 Cups of fresh fruit: raspberries, strawberries, kiwi, blackberries, etc. Can be a mixture or all of one.
1/2 C Chocolate chips
Directions:
First prepare the crust. In a small bowl, sift together flour and sugar. In your mixing bowl, beat butter until softened. Beat in sugar until fluffy. Then gradually add the beaten egg (do not overmix). Add the flour mixture all at one and stir until just blended and dough balls up.
Lay out a piece of plastic wrap. Flatten the dough into a disc on top of the wrap. Cover with another sheet of plastic wrap. Refrigerate 20 minutes.
Have a 8-9 inch tart pan with removable bottom ready. I don't have a tart pan so I used a springform pan and it worked out just fine. removing the bottom isn't really necessary so a pie dish would work as well.
Roll out the pastry to an 11-12 inch circle. I like to roll mine out while it is between the plastic wrap so it doesn't stick to the counter or my rolling pin. If you don't, make sure the surface is well floured. Once the pastry is an inch larger than your pan, place it in the pastry pan. Push down the edges and make a lip about an inch up the sides. Any extra dough can be discarded or made into cinnamon sticks!
Now, poke holes in the crust with a fork all over the bottom of the pan. This will prevent bubbles from forming as it bakes. Refrigerate the crust another 20 minutes, while preheating the oven to 400 degrees.
Bake the crust for 20-25 minutes or until dry and golden brown. You can put rice or bean weights into it if you prefer but I did not and the crust was fine. Cool crust before filling.
Pastry Cream:
In a medium bowl, mix the sugar and egg yolks. Sift the flour and cornstarch together then add to the eggs, mixing until smooth.
Meanwhile, in a medium saucepan combine the milk and vanilla. Put over medium heat until boiling (the milk will start to foam). Remove from heat and slowly add to egg mixture, stirring constantly to prevent scrambling the eggs. Once fully incorporated, put the mixture back in the saucepan over medium heat. Whisk continuously until boiling. Then whisk for another 30-60 seconds until it becomes very thick. Remove from heat and place in a clean bowl. Cover with plastic wrap, pushing it down to touch the surface and prevent a skin from forming. Cool. Refrigerate for up to 3 days if not using immediately.
Before you add the cream to the crust, melt 1/2 cup of chocolate chips and spread a think layer over the crust. Refrigerate for 10 minutes or until hard. This helps keep the crust from getting soggy once you put the filling in. And it is tasty!
Assemble the tart on the day it will be served. Place in the cream filling. On top arrange the fruit. If desired brush on a glaze (I did not). The recipe said to serve at room temperature, which I did.
Thursday, July 1, 2010
New York Cheesecake

I actually made this cheesecake some time ago. It is one of the best I have ever made. Cheesecake is one of those great foods that tastes better and better as it ages.
This is a "New York" cheesecake because it is made with cream cheese and is taller than most (4 packages of cream cheese as opposed to 3 in other recipes).
I made 1 and 1/2 times the crust recipe because the crust is one of my favorite parts of cheesecake and there never seems to be enough to truly coat the bottom and sides. I might have actually made a little too much though because some pieces had a fairly thick corner crust.
Ingredients:
Crust:
2 C of Graham Cracker Crumbs (ground up in food processor)
1/4 C sugar
1/2 C unsalted butter, melted (I honestly can't remember if I actually used this much. Use enough to get the proper consistency)
Filling:
4 8 oz packages of cream cheese, room temperature (use full fat, does not turn out well with fat free)
1 C sugar
3 Tbs flour
5 eggs, room temp
1/3 C heavy whipping cream
1 Tbs lemon zest (do not leave this out, it adds the most beautiful hint of lemon taste to the final product)
1 tsp vanilla
Topping:
1 C sour cream (recipe I used said full fat, not sure if that is important)
2 Tbs sugar
1/2 tsp vanilla
Directions:
Grease 9 inch spring-form pan (I have made cheesecake in a 9 inch cake pan before but it overflowed so make sure you dish is big enough). Place pan on baking sheet to catch any leaks. Preheat oven to 350.
Combine the crust ingredients and press on bottom and sides of spring-form pan. Place in fridge to harden while you prepare the filling.
Mix cream cheese, sugar, and flour on medium speed until smooth (about 2 minutes). Make sure you scrape the bowl so no pieces go unmixed. Add eggs one at a time, beating after each. Add the whipping cream, lemon zest, and vanilla. Again, make sure the sides of the bowl are scraped and everything is incorporated together.
Take the crust out of the fridge and pour in the filling. Place the spring-form pan on a baking sheet and into the oven. Bake for 15 minutes at 350 degrees then turn the heat down to 250 and bake for another 1 1/2 hours. The cake should be firm around the edges but still a bit wobbly in the center. Avoid over baking. Remove from oven and set on rack to cool.
You want to put the topping on a warm cheesecake so immediately prepare. Mix the topping ingredients and spread over the warm cheesecake. Return to the oven to bake for 15 minutes.
When you remove the cheesecake from the oven, run a knife around the rim to loosen the cake from the sides. This will prevent cracking as the cake cools. Wait until it has cooled completely to cover and store in the fridge. Refrigerate at least a day. I am not kidding when I say it tastes much better after a day or two in the fridge. This lets the flavors settle.
This cheesecake is so rich that you will easily get 16 slices so invite some friends over to share the goodness!
The cheesecake can also be frozen for several months is wrapped in aluminum foil and placed in a freezerbag. Thaw in fridge overnight.
Tuesday, June 22, 2010
Carrot Bread Muffins

These low-fat muffins were surprisingly sweet and moist. They also kept really well stored in a ziploc bag. I got the recipe from allrecipes.com and it said it made 10 servings. However, I was able to make a dozen muffins from the recipe.
I had originally purchased some applesauce to use in some chocolate chip cookies. The cookies turned out okay, but not very cookie like. They were more spongy. So I decided to make something else with the rest of the applesauce. So instead of butter or oil, these muffins were made with 3/4 cup of applesauce. You can't even tell! They are a great treat. Plus, since there are real carrots in them, you are getting some veggies in too! Win win!
Ingredients:
1 C sugar
1 C flour
1/2 C whole wheat flour
1 tsp baking powder
1 tsp baking soda
1 tsp salt
1 tsp cinnamon
3/4 C unsweetened applesauce
2 eggs
1 tsp vanilla
1 C shredded carrot
1/4 C chopped walnuts (optional, I did not use)
Directions:
Preheat oven to 350 degrees. Mix sugar, flour, baking soda, baking powder, salt, and cinnamon in a large bowl. In a separate bowl beat together applesauce, eggs, and vanilla. Add to dry ingredients, stirring until just moistened. Fold in carrots and walnuts (if desired). Spoon batter into muffin tins. Bake for 20-25 min or until done.
If you desire a carrot bread loaf, put batter in an 8 x 4 x 2 inch loaf pan and bake for 50-55 min.
Saturday, June 12, 2010
French Bread

This is a recipe I got from my friend. She does weight watchers and loves this bread recipe because it doesn't have any fat it in. I made it yesterday and it was yummy! I had some for breakfast too.
Ingredients:
1 C warm water
1 1/4 tsp yeast
1/2 TBS sugar
1/2 Tbs salt
3 1/2 C flour
Directions:
Mix the water, yeast and sugar. Let yeast develop for 5-10 min. Sift together salt and flour. Slowly add to yeast mixture. Once combined, knead dough for a minute or two. Place in greased bowl, cover with wet towel, and let rise 1 1/2 hours.
Once risen, roll out the loaf to roughly a 16x12 inch rectangle. Roll loaf and shape ends. Place on greased baking sheet. Brush with butter then cover and let rise 45 min.
Place a dish of water in lowest rack of oven. Preheat to 450. (The water creates steam, which helps make the crust nice and crusty, use this technique whenever you bake bread!) Bake loaf for five minutes at 450 then 20-25 min at 350.
Don't forget to remove the dish of water once your oven has cooled!
Saturday, May 22, 2010
Chicken Pot Pie

 Another frozen meal I made for my mom was a chicken pot pie. I usually make the Bisquick version but decided that the crust would be really soggy and might not work well frozen.
I usually am a purist and like to make everything from scratch. I have tried many pie crust recipies but simply never get the amazing flaky and delicious results of store bought crusts. So this time, I decided to try the Krusteaz Pie Crust mix where you just add water. LOVE IT! It was inexpensive and the crust was grand. Jeff and I liked it much better than the Bisquick filling which gets soggy. Plus it was really easy.
Okay, here is my recipe:
1-2 Cups Cooked, Cubed chicken (depending on how big of a dish you are making)
2 Cups of frozen vegetables, thawed (or fresh if you have them on hand)
1 Can cream of chicken soup
1 pie crust
Mix the first three ingredients and put in casserole dish. Cover with the pie crust. Bake at 450 degrees for 30-35 minutes or until crust is golden brown.
To freeze: Freeze before baking for one hour. Remove from freezer and wrap with freezer wrap. When ready to eat, remove from freezer one and a half hours before cooking time to thaw. Cover edges of pie crust with foil to prevent over browning. Bake at 450 degrees for 1 hour and 15 min or until crust is brown and mixture inside is hot.
*note: if using potatoes in pie, do not freeze. Texture will be unpleasant.*
This is a great quick meal you can prepare any day. On days when you have more time and/or produce, use the fresh stuff because if takes the pie to a whole new level.
Wednesday, May 12, 2010
Pizza Casserole
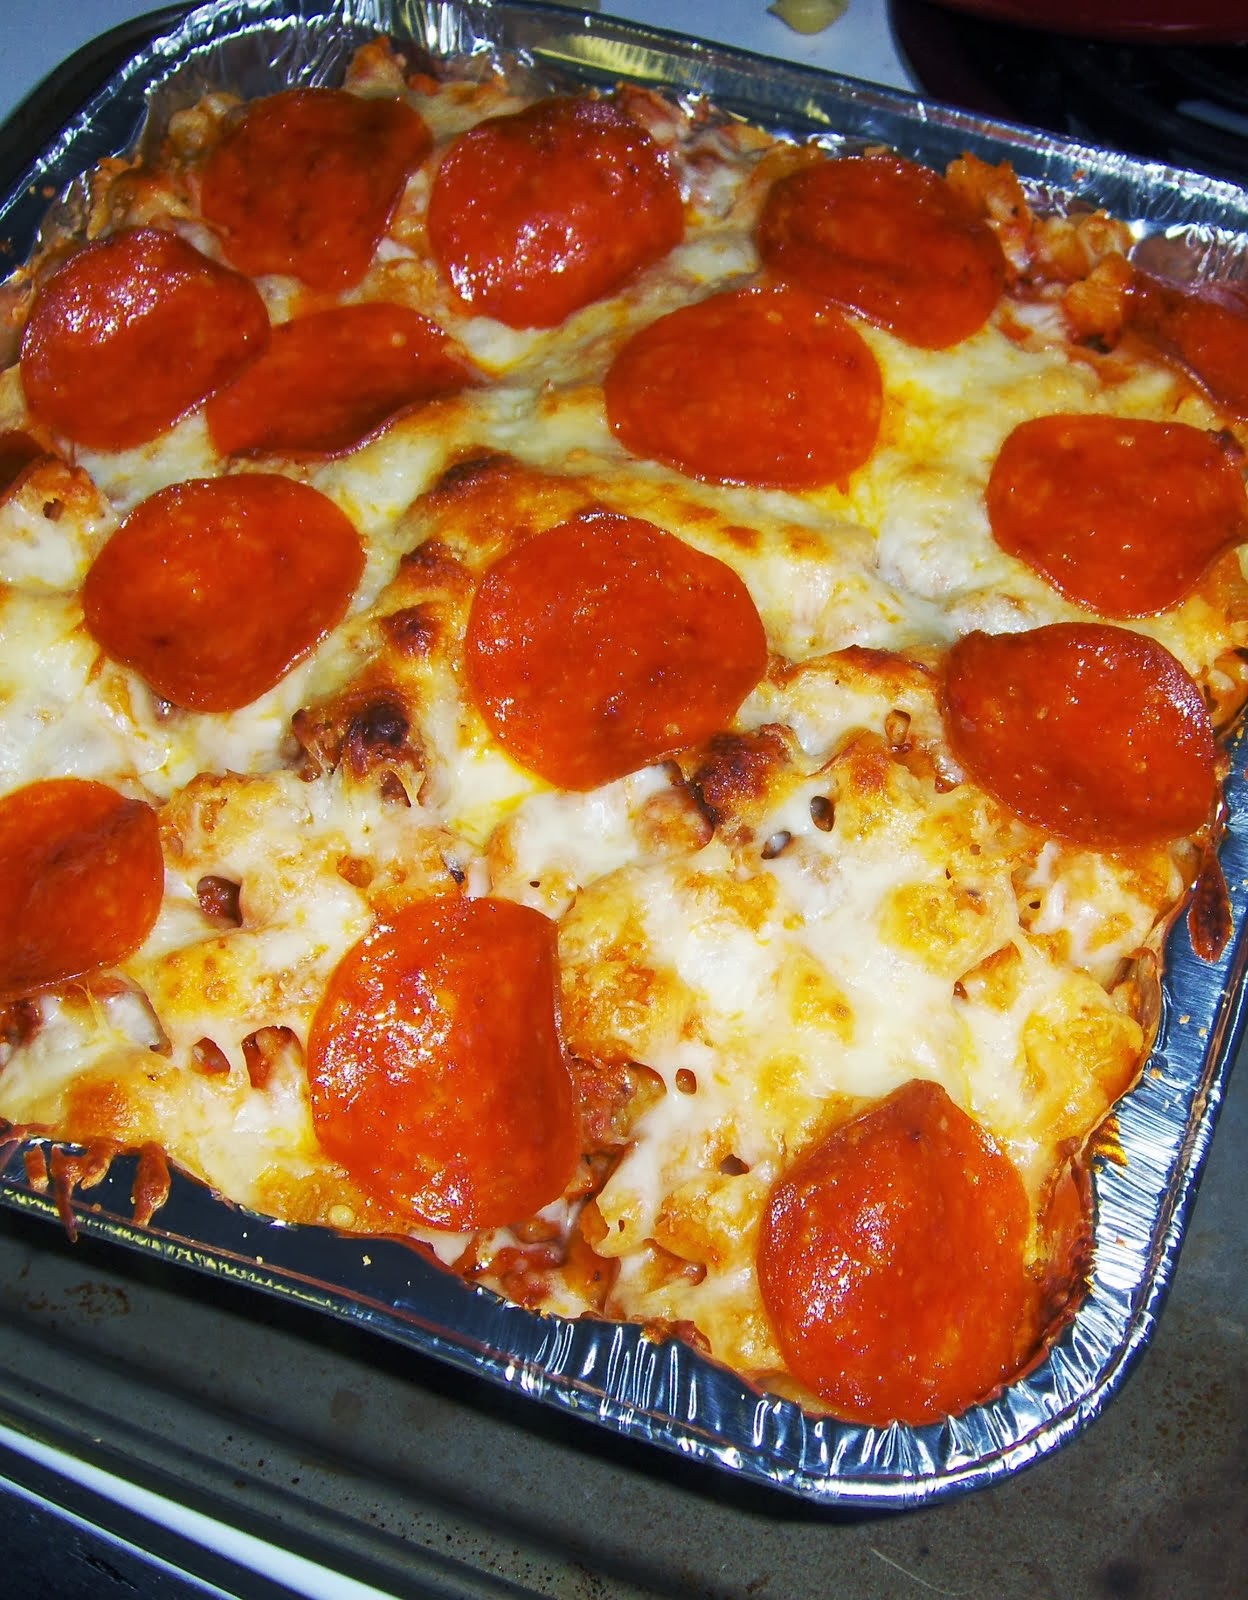
For my mother's birthday this year, I decided to make her a few frozen meals. This way, she could just pull something out of the freezer but still enjoyed the homemade goodness of it. I, of course, doubled all the recipes so I could try out the food first and make sure it tasted good.
This pizza casserole tasted similar to one my family used to make growing up. However, we made that casserole without meat and this one has ground beef in it. So I imagine if you are in a vegetarian mood, this would turn out just find without the beef. If I were to change anything about the recipe, I would layer it. Put cheese and pepperoni in between layers of pasta, instead of just on top.
Ingredients:
1lb ground beef
1/2 large onion, chopped
1 jar (28 oz) spaghetti sauce
1 pkg (8oz) spiral pasta
2 cups (8 oz) shredded mozzarella cheese
4 oz pepperoni
Directions:
Prepare pasta as directed on pacakage. Meanwhile, brown ground beef and onion in a large skillet. Drain fat. Once noodles are cooked and drained, add them and the spaghetti sauce to the meat. Put contents in a 13x9 casserole dish. Sprinkle with cheese and pepperoni. (Alternately, put half of contents in a 13x9 dish, sprinkle with cheese and pepperoni, add the rest of the pasta and put on another layer of cheese and pepperoni.)
If you wish to freeze, allow to cool and then cover and freeze. Let thaw in fridge overnight. Bake in preheated oven at 350 for 35-40 minutes or until heated through.
If you do not want to freeze it, simple put in the oven until cheese is melted and bubbly.
Monday, May 3, 2010
Baked Pork Chops

Kudos to Nana for this recipe. I usually have a hard time deciding what to do with my pork chops so I quite enjoyed this dish, which gave them flavor and tenderness.
Ingredients:
1 envelope of dry onion soup mix
1 Tbs crispy fried onions
3/4 Tbs flour
1-2 tsp Garlic Salt or your choice of seasoning
1 Tbs brown sugar
1 egg
Pork Chops
Directions:
Combine the first five ingredients in a gallon ziploc bag. Beat egg and dip the pork chops in it to coat. Put pork chops, one at a time, into bag and shake to coat. Place on greased baking dish and bake in 375 degree oven for 20 minutes. Turn the pork chops and bake for another 20 minutes. If desired, place about 1 tsp of margarine on chops when turning. When done baking, let stand for a few minutes and then serve.
Friday, April 30, 2010
Italian Chicken in the Crock Pot
This is one of my favorite crock pot recipes. It is so easy and yet tastes so delicious, I just love it.
Ingredients:
4 boneless chicken breasts
1 Envelope Good seasons Italian dressing mix
1 C water
8 oz. cream cheese
1 can cream of chicken soup
Directions:
Place chicken in the bottom of the crock pot. Mix water and the dressing mix. Pour over chicken and cook on low for 3 hours. Then mix the cream cheese and soup. Pour over the chicken and cook until the chicken is done. Use a fork to shred the chicken and serve over rice or pasta.
Sorry no pictures....I made this with chicken thighs and bones and it came out a bit too watery and not very pretty looking. So stick with boneless chicken breasts.
Saturday, April 17, 2010
Sopapillas
 Sorry my dessert posts outnumber all of my other posts. They are just so fun to make and eat! Yesterday my brother, Tyler, was over and we made sopapillas together. I have never made them before but I must say these turned out delicious! Sopapillas are fried pastries, commonly referred to as "scones" in Utah.
I got my recipe from Homesicktexan blog if you want to see the original. There is also a great recipe for flour tortillas my family has been making for years and come to find she has the exact same recipe on her website (the best tex-mex tortillas ever!).Note: I thirded the recipe in order to only make a few sopapillas since there were just two of us. The original recipe yeilded 18 sopapillas. With the following amounts, I made 8 moderate sized sopapillas. Sorry for the weird measurements. On things like 1/3 tsp, I just eyeballed it using 1/2 tsp or 1 tsp measuring spoon and everything turned out great.
Ingredients:
1 tsp active dry yeast
1/2 C warm water
1/3 Tbs butter, melted (I actually didn't melt mine all the way...wonder if that made a difference?)
1/3 Tbs sugar
1 1/3 C flour1/3 tsp salt
oil for fryingcinnamon sugar or powdered sugar
honey
Directions:
Mix the yeast and warm water. Let sit for five minutes. Meanwhile, combine flour and salt in a medium bowl. Add the butter and sugar to the yeast mixture and then add to the flour and salt.
Knead dough for two minutes until smooth and elastic.
Let dough rise in covered, greased bowl for one hour until doubled in size. I like to put my bowls in a warm oven for optimal rising.Once risen, punch dough down and roll out on a floured surface until 1/4 inch thick. Cut dough into triangles of desired size.

Heat up 2 inches of oil in a pot to 375 degrees. (If you do not have a candy thermometer, the oil is hot enough when a wooden spoon handle inserted in the oil creates bubbles.)
Fry one or two triangles of dough at a time, browning each side (45 sec to a min. per side). The dough should puff up as it cooks.
Place finished sopapillas on paper towells so excess oil will drain. Dust with cinnamon sugar or powdered sugar. The honey goes inside via a hole you poke in the corner (or bite off). Best while warm!

Friday, April 16, 2010
Dave Stirling's Chocolate Cake

This is a family recipe my Nana gave me and I decided to try out. Although the recipe is titled "cake" these turned out much more like brownies to me. They are quite rich and delicious, with a magical blend of cinnamon and chocolate. Ever taste something and wonder how it could be so delicious, then look at the recipe and realize why (3 sticks of butter?!) ? This is one of those recipes. So if you are looking for a low fat, low sugar dessert, this is not it. Otherwise, enjoy!
The recipe said to bake for 20 minutes. I thought that this would not be nearly enough time since the batter was so thin but mine was baked to perfection in just 22 minutes. Also, Chef Dave insisted that the sifting was key to success so I was sure to actually sift the ingredients (something I usually do not do). I was surprised how much extra flour I had before sifting. Also, he encouraged using extra vanilla and cinnamon, which I did and things turned out great.
Ingredients:
2 Cups flour 1 tsp vanilla
2 Cups sugar 1 C water
1/2 tsp salt 3 Tbs cocoa
2 sticks butter/margarine (1 C) 1 tsp baking soda
1/2 C buttermilk (I used regular milk) 1 tsp cinnamon
Frosting:
1 stick butter/margarine (1/2 C) 3 3/4 C powdered sugar (1 lb)
3 Tbs cocoa 1/2 C chopped pecans (optional)
6 Tbs milk 1 tsp vanilla
Directions:
Sift flour, measure, and sift with sugar, salt, and cinnamon. Heat butter, water, and cocoa in a saucepan. Bring to a boil and then pour over the flour mixture. Mix thouroughly. Meanwhile, mix eggs, soda, buttermilk, and vanilla. Add to the main mixture. Pour batter into a greased 9x13 inch pan. Bake at 350 for 20-22 min.
Start the icing a few minutes before the cake is done. Mix butter, cocoa, and milk in a saucepan. Heat slowly on low heat (do not boil). Remove from heat and add sugar, pecans (if desired), and vanilla. Mix well. Pour over warm cake.

The frosting pours on and hardens as it cools. Jeff and I each has a slice of warm cake. It was good but we actually enjoyed it better the next day, eating it cold from being stored in the refrigerator. The flavors had had time to develop and the cake had turned to a fudge like brownie texture.
Wednesday, March 31, 2010
Creamy Vegetable Soup
 We had a lot of produce from the grocery store so I decided to put it to good use in a soup. This is a great tasting soup. Don't leave out the rosemary - it adds that perfect flavor to the entire dish.
Ingredients:
3 1/2-4 C water
3 potatoes, peeled & cubed
1 tsp salt
2 carrots
2 stalks celery
1/4 onion
1 cube beef bouillon
1 10.75 oz can of cream of chicken
1/4 Tbs parsley
1/2 Tsp garlic powder
black pepper
1/4-1/2 tsp rosemary
Directions:
Boil potatoes in water until tender - about 10-15 min. Add carrots, celery, onion, salt, and beef bouillon. Boil until vegetables are cooked. Turn down heat and add the cream of chicken, parsley, garlic powder, pepper, and rosemary. Stir and heat through.
Monday, March 29, 2010
Chocolate Chip Muffins

Here is a new recipe I tried on Sunday. These are not my favorite muffins ever but they were quick and easy and tasty enough!
Ingredients:
2 1/2 Cups pancake mix
1/2 Cup sugar
1 egg
2/3 Cup water
1/4 C canola oil
Chocolate Chips
Directions: Mix pancake mix and sugar in a large bowl. In a separate bowl, whisk egg, water, and oil. Pour into dry ingredients, mixing until just moistened. Fold in chocolate chips (or blueberries or raspberries if you prefer).
Spray muffin tins with Pam or line with muffin cups. Fill two thirds full with batter. Bake at 400 degrees for 14-16 min.
Saturday, March 13, 2010
Brownie Cream Pie Cake
 This fabulous dessert was adapted from Brownie Mix Bliss, a cookbook that has inspired many delicious treats. Jeff and I were going to some friends for dinner and were delegated the great task of providing dessert. This brownie cream pie has cake-like brownies (don't stop here if you are the type who only eats fudge brownies. Think of it as a brownie-like cake and you will be delighted) with a chocolate pudding filling and a dark fudge icing. Can you say chocolate attack?
Ingredients:
1 19.5 to 19.8 ounce brownie mix
3 large eggs
1/2 C vegetable oil
1 1/2 C cold milk, divided
1 3.5 ounce package instant chocolate pudding
1 tub chocolate icing
Start by preparing your pans and oven. Preheat to 350 degrees. Line two round cake pans with aluminum foil (cut to fit the bottom of the pans). Spray the foil with cooking spray.
Mix the brownie mix, eggs, oil, and 1/4 cup of milk in a medium bowl until well blended. Divide the batter evenly between the two pans. Bake for 18-21 minutes until the edges are set. Let cool completely on a cooling rack.
While the cakes/brownies are cooling, mix the remaining 1 1/4 C milk with the pudding mix. Refrigerate until ready.
When the cakes are cooled, run a knife around the edge of each pan to loosen from sides. Flip one cake out onto serving dish. Remove foil.
 Retrieve pudding from the fridge and spread on top of first layer.
 Carefully remove the second cake from the pan. Remove the foil and put flat side down on pudding. Ice the cake top and sides with icing. Refrigerate until served.
Cooking Blog
I decided to start a blog where I share my experiences baking, frying, grilling, sauteing, and any other type of cooking I come across. I hope to improve my skills in cooking as well as photography (which you will see is in need of some help). What I lack in experience and knowledge, I make up for in fun and a willingness to try new things.
Join me as I begin this journey...
Join me as I begin this journey...
Subscribe to:
Posts (Atom)